

1x
S1
Civilian (C)
1x
S1
Civilian (C)
2x
S1
Civilian (C)
Datei:Hardpoints Icon lifesupport.svg Lebenserhaltungssysteme
1x
S1
2x
S1
Civilian (C)
1x
S1
5.000 🗡️ · 50 m50 km <br />5.000 cm <br />
Seitentitel ist: Nicht FoXFTWs/Spielwiese
| Page Image | Subtyp | Minimaler Temperaturwiderstand | Maximaler Temperaturwiderstand | Modifikator erlittener physischer Schaden | Modifikator erlittener Energieschaden | Modifikator erlittener Verzerrungsschaden | Modifikator erlittener thermischer Schaden | Modifikator erlittener biochemischer Schaden | Modifikator erlittener Betäubungsschaden | Hersteller | Ist Basisversion | |
|---|---|---|---|---|---|---|---|---|---|---|---|---|
| A23 Helmet Woodland | Undersuit | -30 °C | 60 °C | 90% | 90% | 90% | 90% | 90% | 85% | Clark Defense Systems | ✓ | |
| ADP-mk4 Helmet Exec | Heavy Armor | -70 °C | 100 °C | 60% | 60% | 60% | 60% | 60% | 40% | Clark Defense Systems | ✕ | |
| ADP-mk4 Helmet Red Alert | Heavy Armor | -70 °C | 100 °C | 60% | 60% | 60% | 60% | 60% | 40% | Clark Defense Systems | ✕ | |
| ADP-mk4 Helmet Woodland | Heavy Armor | -70 °C | 100 °C | 60% | 60% | 60% | 60% | 60% | 40% | Clark Defense Systems | ✓ | |
| APOS Helmet | ||||||||||||
 | Arden-SL Helmet | Light Armor | -38 °C | 68 °C | 80% | 80% | 80% | 80% | 80% | 70% | Roussimoff Rehabilitation Systems | ✓ |
 | Arden-SL Helmet Archangel | Light Armor | -38 °C | 68 °C | 80% | 80% | 80% | 80% | 80% | 70% | Roussimoff Rehabilitation Systems | ✕ |
 | Arden-SL Helmet Balefire | Light Armor | -38 °C | 68 °C | 80% | 80% | 80% | 80% | 80% | 70% | Roussimoff Rehabilitation Systems | ✕ |
 | Arden-SL Helmet Coramor Edition "Fate" | Light Armor | -38 °C | 68 °C | 80% | 80% | 80% | 80% | 80% | 70% | Roussimoff Rehabilitation Systems | ✕ |
| Arden-SL Helmet Coramor Edition "Kismet" | Light Armor | -38 °C | 68 °C | 80% | 80% | 80% | 80% | 80% | 70% | Roussimoff Rehabilitation Systems | ✕ |
 | Arden-SL Helmet Red Alert | Light Armor | -38 °C | 68 °C | 80% | 80% | 80% | 80% | 80% | 70% | Roussimoff Rehabilitation Systems | ✕ |
Die Zeus war ein Kurzstrecken-Raumschiff, das von Roberts Space Industries (RSI) entwickelt wurde, und war das erste Schiff mit einem Quantenantrieb, das Zivilisten auf dem kommerziellen Markt angeboten wurde. Nachdem RSI im Jahr 2075 den ersten Quantenantrieb für das Militär entwickelt hatte, wuchs die Nachfrage nach einer zivilen Version, bis schließlich in den 2130er Jahren der erste kommerzielle Prototyp eines quantenfähigen Raumschiffs gebaut wurde. Das Schiff, das den Namen Zeus trug, wurde erst 2140 auf den Markt gebracht, da es bei den ersten Testflügen Probleme mit der Hüllenintegrität gab. Nach vielen Projektverzögerungen holte sich RSI die Hilfe der Navy-Testpilotin Michelle Saleno, die als erster Mensch eine Quantenreise über die Umlaufbahn des Jupiters (Sol V) hinaus unternahm. Saleno überzeugte die Amecanio Navy, die 999. Teststaffel für die Evaluierung modernster Raumschiffe zu gründen, und die Navy stimmte zu, die 999. zu nutzen, um RSI bei der Weiterentwicklung der Zeus zu helfen. Nach einer kompletten Überholung des Rumpfes der Zeus, die auf den Rat von Saleno und dem 999th Test Squadron zurückging, flog Saleno die Zeus im Jahr 2137 erfolgreich. Die Verfügbarkeit der Zeus trug entscheidend dazu bei, die frühe Expansion der Menschen über ihren Heimatplaneten hinaus zu beschleunigen.[1]
[[-Has subobject::300i]][[Typ::+]][[Komponentenklasse::+]]Outputs:
?Aus Spieldaten#-=from_gamedataOther:?Anzahl#-=count ?Hardpoint Minimalgröße#-=min_size ?Hardpoint Maximalgröße#-=max_size ?Komponentenklasse#-=class ?Typ#-=type ?Subtyp#-=sub_type ?Name#-=name ?Inventar#-n=scu ?UUID#-=uuid ?Hardpoint#-=hardpoint ?Klassenname#-=class_name ?Magazingröße#-=magazine_capacity ?Schubkapazität=thrust_capacity ?Schaden=damage ?Schadensradius=damage_radius ?Kraftstoffkapazität=fuel_capacity ?Kraftstoffaufnahmerate=fuel_intake_rate ?Parent Hardpoint#-=parent_hardpoint ?Root Hardpoint#-=root_hardpoint ?Parent Hardpoint UUID#-=parent_uuid ?Hardpoint Icon#-=icon ?Schadenspunkte=hp ?Position#-=position ?Name.Grad#-=item_grade ?Name.Klasse#-=item_class ?Name.Größe#-=item_size
?Name.Hersteller#-=manufacturer
sort=Komponentenklasse,Hardpoint,Typ,Hardpoint Maximalgröße,Anzahlorder=asc,desc,asc,asc,asc
limit=1000
table#1 {
table#2 {
"300i",
["class"] = "Antrieb",
["class_name"] = "qtnk_orig_300i",
["count"] = 1,
["from_gamedata"] = true,
["hardpoint"] = "hardpoint_quantum_fuel_tank",
["icon"] = "Datei:Hardpoints Icon Quantentreibstofftank.svg",
["max_size"] = 1,
["min_size"] = 1,
["name"] = "Internal Tank",
["root_hardpoint"] = "qtnk_orig_300i",
["sub_type"] = "Quantentreibstofftank",
["type"] = "Quantentreibstofftank",
["uuid"] = "f27f973d-9757-4fff-bc8d-00657d5b731d",
},
table#3 {
"300i",
["class"] = "Antrieb",
["class_name"] = "qdrv_tars_s01_expedition_scitem",
["count"] = 1,
["from_gamedata"] = true,
["hardpoint"] = "hardpoint_quantum_drive",
["icon"] = "Datei:Hardpoints Icon Sprungmodul.svg",
["item_class"] = "Civilian",
["item_grade"] = "C",
["item_size"] = 1,
["manufacturer"] = "Tarsus",
["max_size"] = 1,
["min_size"] = 1,
["name"] = "Expedition",
["root_hardpoint"] = "qdrv_tars_s01_expedition_scitem",
["sub_type"] = "Sprungmodul",
["type"] = "Sprungmodul",
["uuid"] = "4702547f-fa0f-4f6c-b2ed-9782ee9f518b",
},
table#4 {
"300i",
["class"] = "Antrieb",
["class_name"] = "orig_300i_intake",
["count"] = 1,
["from_gamedata"] = true,
["hardpoint"] = "hardpoint_300i_intake",
["icon"] = "Datei:Hardpoints Icon Treibstoffeinlass.svg",
["max_size"] = 1,
["min_size"] = 1,
["name"] = "Treibstoffeinlass",
["root_hardpoint"] = "orig_300i_intake",
["sub_type"] = "Treibstoffeinlass",
["type"] = "Treibstoffeinlass",
["uuid"] = "5d8d75ac-e67d-4af7-915f-e6311a644835",
},
table#5 {
"300i",
["class"] = "Antrieb",
["class_name"] = "intk_orig_300i",
["count"] = 2,
["from_gamedata"] = true,
["fuel_intake_rate"] = "6 L/s6 SCU/s <br />",
["hardpoint"] = "hardpoint_fuel_intake_left",
["icon"] = "Datei:Hardpoints Icon Treibstoffeinlass.svg",
["max_size"] = 1,
["min_size"] = 1,
["name"] = "Treibstoffeinlass",
["root_hardpoint"] = "intk_orig_300i",
["sub_type"] = "Treibstoffeinlass",
["type"] = "Treibstoffeinlass",
["uuid"] = "ed230fc3-27d8-42f5-ad2e-7bc53b77e374",
},
table#6 {
"300i",
["class"] = "Antrieb",
["class_name"] = "htnk_orig_300i",
["count"] = 2,
["from_gamedata"] = true,
["hardpoint"] = "hardpoint_fuel_tank_left",
["icon"] = "Datei:Hardpoints Icon Treibstofftank.svg",
["max_size"] = 1,
["min_size"] = 1,
["name"] = "Internal Tank",
["root_hardpoint"] = "htnk_orig_300i",
["sub_type"] = "Treibstofftank",
["type"] = "Treibstofftank",
["uuid"] = "bd985eb3-b2ae-495b-b776-2e955cfb324c",
},
table#7 {
"300i",
["class"] = "Antrieb",
["class_name"] = "dockingtube_fuel_ports_orig_300i",
["count"] = 1,
["from_gamedata"] = true,
["hardpoint"] = "hardpoint_fuel_port",
["max_size"] = 1,
["min_size"] = 1,
["name"] = "Treibstoffanschluss",
["root_hardpoint"] = "dockingtube_fuel_ports_orig_300i",
["sub_type"] = "Treibstoffanschluss",
["type"] = "Treibstoffanschluss",
["uuid"] = "683e3006-ee36-4c0b-9544-3ee075417ff1",
},
table#8 {
"300i",
["class"] = "Ausstattung",
["class_name"] = "orig_300i_seat_bed",
["count"] = 1,
["from_gamedata"] = true,
["hardpoint"] = "hardpoint_bed",
["max_size"] = 1,
["min_size"] = 1,
["name"] = "Bett",
["root_hardpoint"] = "orig_300i_seat_bed",
["sub_type"] = "Bett",
["type"] = "Bett",
["uuid"] = "05f30fb7-2aa4-497a-8e30-9b07f2993460",
},
table#9 {
"300i",
["children"] = table#10 {
table#9,
},
["class"] = "Ausstattung",
["class_name"] = "orig_bedding_duvet_4_d",
["count"] = 1,
["from_gamedata"] = true,
["hardpoint"] = "hardpoint_bedding",
["isChild"] = true,
["max_size"] = 1,
["min_size"] = 1,
["name"] = "Bett",
["parent_hardpoint"] = "Bett",
["parent_uuid"] = "05f30fb7-2aa4-497a-8e30-9b07f2993460",
["root_hardpoint"] = "orig_300i_seat_bed",
["sub_type"] = "Bett",
["type"] = "Bett",
["uuid"] = "2b4ca23b-447c-40c8-b069-aef3d2174820",
},
table#11 {
"300i",
["class"] = "Ausstattung",
["class_name"] = "armr_orig_300i",
["count"] = 1,
["from_gamedata"] = true,
["hardpoint"] = "hardpoint_armor",
["max_size"] = 1,
["min_size"] = 1,
["name"] = "300i Ship Armor",
["root_hardpoint"] = "armr_orig_300i",
["sub_type"] = "Panzerung",
["type"] = "Panzerung",
["uuid"] = "8fa4aa51-ff08-4728-ae08-64861ab3daf9",
},
table#12 {
"300i",
["class"] = "Avionik",
["class_name"] = "radr_wlop_s01_capstan",
["count"] = 1,
["from_gamedata"] = true,
["hardpoint"] = "hardpoint_radar",
["icon"] = "Datei:Hardpoints Icon Radar.svg",
["item_class"] = "Civilian",
["item_grade"] = "C",
["item_size"] = 1,
["manufacturer"] = "Unknown manufacturer",
["max_size"] = 1,
["min_size"] = 1,
["name"] = "Capston",
["root_hardpoint"] = "radr_wlop_s01_capstan",
["sub_type"] = "Radar",
["type"] = "Radar",
["uuid"] = "22121214-6333-4edd-826a-0d06c15b5636",
},
table#13 {
"300i",
["class"] = "Bewaffnung",
["class_name"] = "faux_weaponport",
["count"] = 3,
["from_gamedata"] = true,
["hardpoint"] = "faux_hardpoint_weaponport",
["icon"] = "Datei:Hardpoints Icon Waffenport.svg",
["isChild"] = true,
["max_size"] = 1,
["min_size"] = 0,
["name"] = "Pistole",
["parent_hardpoint"] = "Waffenständer",
["parent_uuid"] = "a0d9d219-a054-44ca-be18-a167a7c1c56d",
["root_hardpoint"] = "weapon_rack_orig_300i_2_slots",
["sub_type"] = "Waffenport",
["type"] = "Waffenport",
},
table#14 {
"300i",
["class"] = "Bewaffnung",
["class_name"] = "faux_weaponport",
["count"] = 2,
["from_gamedata"] = true,
["hardpoint"] = "faux_hardpoint_weaponport",
["icon"] = "Datei:Hardpoints Icon Waffenport.svg",
["isChild"] = true,
["max_size"] = 4,
["min_size"] = 2,
["name"] = "Gewehr",
["parent_hardpoint"] = "Waffenständer",
["parent_uuid"] = "a0d9d219-a054-44ca-be18-a167a7c1c56d",
["root_hardpoint"] = "weapon_rack_orig_300i_2_slots",
["sub_type"] = "Waffenport",
["type"] = "Waffenport",
},
table#15 {
"300i",
["class"] = "Bewaffnung",
["class_name"] = "faux_magazinemagazine",
["count"] = 1,
["from_gamedata"] = true,
["hardpoint"] = "faux_hardpoint_magazine",
["icon"] = "Datei:Hardpoints Icon Magazin.svg",
["isChild"] = true,
["max_size"] = 1,
["min_size"] = 1,
["name"] = "Magazin",
["parent_hardpoint"] = "Origin Jumpworks Noise Launcher",
["parent_uuid"] = "d6e0229a-f18e-4dc6-a590-942089da7a2d",
["root_hardpoint"] = "orig_cml_noise_small",
["sub_type"] = "Magazin",
["type"] = "Magazin",
},
table#16 {
"300i",
["class"] = "Bewaffnung",
["class_name"] = "faux_magazinemagazine",
["count"] = 1,
["from_gamedata"] = true,
["hardpoint"] = "faux_hardpoint_magazine",
["icon"] = "Datei:Hardpoints Icon Magazin.svg",
["isChild"] = true,
["max_size"] = 1,
["min_size"] = 1,
["name"] = "Magazin",
["parent_hardpoint"] = "Origin Jumpworks Decoy Launcher",
["parent_uuid"] = "c113f1d1-536a-4d7d-b770-ce867f60d9b8",
["root_hardpoint"] = "orig_cml_decoy_small",
["sub_type"] = "Magazin",
["type"] = "Magazin",
},
table#17 {
"300i",
["children"] = table#18 {
table#19 {
"300i",
["class"] = "Bewaffnung",
["class_name"] = "misl_s02_cs_thcn_strikeforce",
["count"] = 2,
["from_gamedata"] = true,
["hardpoint"] = "missile_01_attach",
["icon"] = "Datei:Hardpoints Icon Geschütze.svg",
["isChild"] = true,
["item_size"] = 2,
["manufacturer"] = "Thermyte Concern",
["max_size"] = 2,
["min_size"] = 2,
["name"] = "StrikeForce II Missile",
["parent_hardpoint"] = "MSD-212 Missile Rack",
["parent_uuid"] = "b684b116-ba0d-41fb-82fb-720ecd6d4d21",
["root_hardpoint"] = "mrck_s02_behr_single_s02",
["sub_type"] = "Raketen",
["type"] = "Geschütze",
["uuid"] = "9b2c25cb-fc57-42b5-95cd-1ae89a622bd7",
},
},
["class"] = "Bewaffnung",
["class_name"] = "mrck_s02_behr_single_s02",
["count"] = 2,
["from_gamedata"] = true,
["hardpoint"] = "hardpoint_weapon_missilerack_left",
["icon"] = "Datei:Hardpoints Icon Geschütze.svg",
["item_size"] = 2,
["manufacturer"] = "Behring Applied Technology",
["max_size"] = 2,
["min_size"] = 2,
["name"] = "MSD-212 Missile Rack",
["root_hardpoint"] = "mrck_s02_behr_single_s02",
["sub_type"] = "Raketenwerfer",
["type"] = "Geschütze",
["uuid"] = "b684b116-ba0d-41fb-82fb-720ecd6d4d21",
},
table#19,
table#20 {
"300i",
["children"] = table#21 {
table#22 {
"300i",
["class"] = "Bewaffnung",
["class_name"] = "faux_magazinemagazine",
["count"] = 1,
["from_gamedata"] = true,
["hardpoint"] = "faux_hardpoint_magazine",
["icon"] = "Datei:Hardpoints Icon Magazin.svg",
["isChild"] = true,
["magazine_capacity"] = 0,
["max_size"] = 1,
["min_size"] = 1,
["name"] = "Magazin",
["parent_hardpoint"] = "M5A Cannon",
["parent_uuid"] = "f72ca643-b48c-4f6e-abb7-d5bc8eb261aa",
["root_hardpoint"] = "mount_gimbal_s3",
["sub_type"] = "Magazin",
["type"] = "Magazin",
},
},
["class"] = "Bewaffnung",
["class_name"] = "behr_lasercannon_s3",
["count"] = 1,
["from_gamedata"] = true,
["hardpoint"] = "hardpoint_class_2",
["icon"] = "Datei:Hardpoints Icon Waffe.svg",
["isChild"] = true,
["item_size"] = 3,
["manufacturer"] = "Behring Applied Technology",
["max_size"] = 3,
["min_size"] = 2,
["name"] = "M5A Cannon",
["parent_hardpoint"] = "VariPuck S3 Gimbal Mount",
["parent_uuid"] = "8197c45b-eaf4-4836-a8f0-837d1875cd9c",
["root_hardpoint"] = "mount_gimbal_s3",
["sub_type"] = "WeaponGun",
["type"] = "Bewaffnung",
["uuid"] = "f72ca643-b48c-4f6e-abb7-d5bc8eb261aa",
},
table#23 {
"300i",
["children"] = table#24 {
table#25 {
"300i",
["class"] = "Bewaffnung",
["class_name"] = "faux_magazinemagazine",
["count"] = 2,
["from_gamedata"] = true,
["hardpoint"] = "faux_hardpoint_magazine",
["icon"] = "Datei:Hardpoints Icon Magazin.svg",
["isChild"] = true,
["magazine_capacity"] = 2589,
["max_size"] = 1,
["min_size"] = 1,
["name"] = "Magazin",
["parent_hardpoint"] = "SW16BR3 “Shredder” Repeater",
["parent_uuid"] = "bbfbb4b5-c26e-4bee-9d41-9679e102e860",
["root_hardpoint"] = "mount_gimbal_s3",
["sub_type"] = "Magazin",
["type"] = "Magazin",
},
},
["class"] = "Bewaffnung",
["class_name"] = "behr_ballisticrepeater_s3",
["count"] = 2,
["from_gamedata"] = true,
["hardpoint"] = "hardpoint_class_2",
["icon"] = "Datei:Hardpoints Icon Waffe.svg",
["isChild"] = true,
["max_size"] = 3,
["min_size"] = 2,
["name"] = "SW16BR3 “Shredder” Repeater",
["parent_hardpoint"] = "VariPuck S3 Gimbal Mount",
["parent_uuid"] = "8197c45b-eaf4-4836-a8f0-837d1875cd9c",
["root_hardpoint"] = "mount_gimbal_s3",
["sub_type"] = "WeaponGun",
["type"] = "Bewaffnung",
["uuid"] = "bbfbb4b5-c26e-4bee-9d41-9679e102e860",
},
table#26 {
"300i",
["children"] = table#27 {
table#20,
table#23,
},
["class"] = "Bewaffnung",
["class_name"] = "mount_gimbal_s3",
["count"] = 3,
["from_gamedata"] = true,
["hardpoint"] = "hardpoint_weapon_wing_left",
["icon"] = "Datei:Hardpoints Icon Waffe.svg",
["item_size"] = 4,
["manufacturer"] = "Flashfire Systems",
["max_size"] = 3,
["min_size"] = 3,
["name"] = "VariPuck S3 Gimbal Mount",
["root_hardpoint"] = "mount_gimbal_s3",
["sub_type"] = "Kardanische Halterung",
["type"] = "Bewaffnung",
["uuid"] = "8197c45b-eaf4-4836-a8f0-837d1875cd9c",
},
table#22,
table#25,
table#28 {
"300i",
["class"] = "Fahrzeugpart",
["count"] = 1,
["from_gamedata"] = true,
["hardpoint"] = "wing_right_top",
["hp"] = "200 ❤️",
["isChild"] = true,
["max_size"] = 1,
["min_size"] = 1,
["name"] = "Wing (right top)",
["parent_hardpoint"] = "Wing (right bottom)",
["root_hardpoint"] = "ORIG_300I",
["sub_type"] = "Fahrzeugpart",
["type"] = "Fahrzeugpart",
},
table#29 {
"300i",
["children"] = table#30 {
table#28,
table#31 {
"300i",
["class"] = "Fahrzeugpart",
["count"] = 1,
["from_gamedata"] = true,
["hardpoint"] = "wing_flap_right",
["hp"] = "200 ❤️",
["isChild"] = true,
["max_size"] = 1,
["min_size"] = 1,
["name"] = "Wing flap (right)",
["parent_hardpoint"] = "Wing (right bottom)",
["root_hardpoint"] = "ORIG_300I",
["sub_type"] = "Fahrzeugpart",
["type"] = "Fahrzeugpart",
},
table#32 {
"300i",
["class"] = "Fahrzeugpart",
["count"] = 1,
["from_gamedata"] = true,
["hardpoint"] = "wing_b_right",
["hp"] = "500 ❤️",
["isChild"] = true,
["max_size"] = 1,
["min_size"] = 1,
["name"] = "Wing b (right)",
["parent_hardpoint"] = "Wing (right bottom)",
["root_hardpoint"] = "ORIG_300I",
["sub_type"] = "Fahrzeugpart",
["type"] = "Fahrzeugpart",
},
},
["class"] = "Fahrzeugpart",
["count"] = 1,
["from_gamedata"] = true,
["hardpoint"] = "wing_right_bottom",
["hp"] = "800 ❤️",
["isChild"] = true,
["max_size"] = 1,
["min_size"] = 1,
["name"] = "Wing (right bottom)",
["parent_hardpoint"] = "Nose",
["root_hardpoint"] = "ORIG_300I",
["sub_type"] = "Fahrzeugpart",
["type"] = "Fahrzeugpart",
},
table#33 {
"300i",
["class"] = "Fahrzeugpart",
["count"] = 1,
["from_gamedata"] = true,
["hardpoint"] = "wing_left_top",
["hp"] = "200 ❤️",
["isChild"] = true,
["max_size"] = 1,
["min_size"] = 1,
["name"] = "Wing (left top)",
["parent_hardpoint"] = "Wing (left bottom)",
["root_hardpoint"] = "ORIG_300I",
["sub_type"] = "Fahrzeugpart",
["type"] = "Fahrzeugpart",
},
table#34 {
"300i",
["children"] = table#35 {
table#33,
table#36 {
"300i",
["class"] = "Fahrzeugpart",
["count"] = 1,
["from_gamedata"] = true,
["hardpoint"] = "wing_flap_left",
["hp"] = "200 ❤️",
["isChild"] = true,
["max_size"] = 1,
["min_size"] = 1,
["name"] = "Wing flap (left)",
["parent_hardpoint"] = "Wing (left bottom)",
["root_hardpoint"] = "ORIG_300I",
["sub_type"] = "Fahrzeugpart",
["type"] = "Fahrzeugpart",
},
table#37 {
"300i",
["class"] = "Fahrzeugpart",
["count"] = 1,
["from_gamedata"] = true,
["hardpoint"] = "wing_b_left",
["hp"] = "500 ❤️",
["isChild"] = true,
["max_size"] = 1,
["min_size"] = 1,
["name"] = "Wing b (left)",
["parent_hardpoint"] = "Wing (left bottom)",
["root_hardpoint"] = "ORIG_300I",
["sub_type"] = "Fahrzeugpart",
["type"] = "Fahrzeugpart",
},
},
["class"] = "Fahrzeugpart",
["count"] = 1,
["from_gamedata"] = true,
["hardpoint"] = "wing_left_bottom",
["hp"] = "800 ❤️",
["isChild"] = true,
["max_size"] = 1,
["min_size"] = 1,
["name"] = "Wing (left bottom)",
["parent_hardpoint"] = "Nose",
["root_hardpoint"] = "ORIG_300I",
["sub_type"] = "Fahrzeugpart",
["type"] = "Fahrzeugpart",
},
table#31,
table#36,
table#32,
table#37,
table#38 {
"300i",
["class"] = "Fahrzeugpart",
["count"] = 1,
["from_gamedata"] = true,
["hardpoint"] = "tail",
["hp"] = "1.900 ❤️",
["isChild"] = true,
["max_size"] = 1,
["min_size"] = 1,
["name"] = "Tail",
["parent_hardpoint"] = "Nose",
["root_hardpoint"] = "ORIG_300I",
["sub_type"] = "Fahrzeugpart",
["type"] = "Fahrzeugpart",
},
table#39 {
"300i",
["children"] = table#40 {
table#29,
table#34,
table#38,
table#41 {
"300i",
["class"] = "Fahrzeugpart",
["count"] = 1,
["from_gamedata"] = true,
["hardpoint"] = "glass_canopy_front",
["hp"] = "1.500 ❤️",
["isChild"] = true,
["max_size"] = 1,
["min_size"] = 1,
["name"] = "Glass canopy (front)",
["parent_hardpoint"] = "Nose",
["root_hardpoint"] = "ORIG_300I",
["sub_type"] = "Fahrzeugpart",
["type"] = "Fahrzeugpart",
},
},
["class"] = "Fahrzeugpart",
["count"] = 1,
["from_gamedata"] = true,
["hardpoint"] = "nose",
["hp"] = "1.900 ❤️",
["isChild"] = true,
["max_size"] = 1,
["min_size"] = 1,
["name"] = "Nose",
["parent_hardpoint"] = "Orig 300i",
["root_hardpoint"] = "ORIG_300I",
["sub_type"] = "Fahrzeugpart",
["type"] = "Fahrzeugpart",
},
table#41,
table#42 {
"300i",
["children"] = table#43 {
table#39,
},
["class"] = "Fahrzeugpart",
["count"] = 1,
["from_gamedata"] = true,
["hardpoint"] = "ORIG_300I",
["hp"] = "0 ❤️",
["max_size"] = 1,
["min_size"] = 1,
["name"] = "Orig 300i",
["root_hardpoint"] = "ORIG_300I",
["sub_type"] = "Fahrzeugpart",
["type"] = "Fahrzeugpart",
},
table#44 {
"300i",
["children"] = table#45 {
table#13,
table#14,
},
["class"] = "Frachtraum",
["class_name"] = "weapon_rack_orig_300i_2_slots",
["count"] = 1,
["from_gamedata"] = true,
["hardpoint"] = "hardpoint_weapon_rack",
["icon"] = "Datei:Hardpoints Icon Pistole S38.svg",
["max_size"] = 1,
["min_size"] = 1,
["name"] = "Waffenständer",
["root_hardpoint"] = "weapon_rack_orig_300i_2_slots",
["sub_type"] = "Waffenständer",
["type"] = "Waffenständer",
["uuid"] = "a0d9d219-a054-44ca-be18-a167a7c1c56d",
},
table#46 {
"300i",
["class"] = "Frachtraum",
["class_name"] = "orig_300i_cargogrid",
["count"] = 1,
["from_gamedata"] = true,
["hardpoint"] = "hardpoint_cargo_grid_front",
["max_size"] = 1,
["min_size"] = 1,
["name"] = "Frachtraum",
["root_hardpoint"] = "orig_300i_cargogrid",
["scu"] = 8000,
["sub_type"] = "Frachtraum",
["type"] = "Frachtraum",
["uuid"] = "1bddc2cc-3765-4eec-8430-31c1697c78eb",
},
table#47 {
"300i",
["class"] = "Systeme",
["class_name"] = "vhcl_selfdestruct_30s",
["count"] = 1,
["damage"] = "5.000 🗡️",
["damage_radius"] = "50 m50 km <br />5.000 cm <br />",
["from_gamedata"] = true,
["hardpoint"] = "hardpoint_selfdestruct",
["icon"] = "Datei:Hardpoints Icon Selbstzerstörung.svg",
["max_size"] = 1,
["min_size"] = 1,
["name"] = "Selbstzerstörung (30s)",
["root_hardpoint"] = "vhcl_selfdestruct_30s",
["sub_type"] = "Selbstzerstörung",
["type"] = "Selbstzerstörung",
["uuid"] = "27875030-1290-4098-827f-f1a5b67c0615",
},
table#48 {
"300i",
["class"] = "Systeme",
["class_name"] = "shld_seco_s01_web_scitem",
["count"] = 2,
["from_gamedata"] = true,
["hardpoint"] = "hardpoint_shield_generator_left",
["icon"] = "Datei:Hardpoints Icon Schildgenerator.svg",
["item_class"] = "Civilian",
["item_grade"] = "C",
["item_size"] = 1,
["manufacturer"] = "Seal Corporation",
["max_size"] = 1,
["min_size"] = 1,
["name"] = "WEB",
["root_hardpoint"] = "shld_seco_s01_web_scitem",
["sub_type"] = "Schildgenerator",
["type"] = "Schildgenerator",
["uuid"] = "6be9c02c-ff32-483f-a6f8-d984dcb97c40",
},
table#49 {
"300i",
["class"] = "Systeme",
["class_name"] = "powr_lplt_s01_powerbolt_scitem",
["count"] = 1,
["from_gamedata"] = true,
["hardpoint"] = "hardpoint_power_plant",
["icon"] = "Datei:Hardpoints Icon Kraftwerksanlage.svg",
["item_class"] = "Civilian",
["item_grade"] = "C",
["item_size"] = 1,
["manufacturer"] = "Lightning Power Ltd.",
["max_size"] = 1,
["min_size"] = 1,
["name"] = "PowerBolt",
["root_hardpoint"] = "powr_lplt_s01_powerbolt_scitem",
["sub_type"] = "Kraftwerksanlage",
["type"] = "Kraftwerksanlage",
["uuid"] = "4a4a2a9c-040f-4f36-befe-7101b230fa53",
},
table#50 {
"300i",
["class"] = "Systeme",
["class_name"] = "lfsp_tydt_s01_comfortair",
["count"] = 1,
["from_gamedata"] = true,
["hardpoint"] = "hardpoint_lifesupport",
["icon"] = "Datei:Hardpoints Icon lifesupport.svg",
["max_size"] = 1,
["min_size"] = 1,
["name"] = "ComfortAir",
["root_hardpoint"] = "lfsp_tydt_s01_comfortair",
["sub_type"] = "Lebenserhaltungssysteme",
["type"] = "Lebenserhaltungssysteme",
["uuid"] = "e947b002-e65e-4637-90b7-c894925d6625",
},
table#51 {
"300i",
["class"] = "Systeme",
["class_name"] = "cool_lplt_s01_arcticstorm_scitem",
["count"] = 2,
["from_gamedata"] = true,
["hardpoint"] = "hardpoint_cooler_left",
["icon"] = "Datei:Hardpoints Icon Kühlaggregat.svg",
["item_class"] = "Civilian",
["item_grade"] = "C",
["item_size"] = 1,
["manufacturer"] = "Lightning Power Ltd.",
["max_size"] = 1,
["min_size"] = 1,
["name"] = "ArcticStorm",
["root_hardpoint"] = "cool_lplt_s01_arcticstorm_scitem",
["sub_type"] = "Kühlaggregat",
["type"] = "Kühlaggregat",
["uuid"] = "d98450a2-605a-47b6-a8cd-f43df14ddf0e",
},
table#52 {
"300i",
["class"] = "Triebwerk",
["class_name"] = "orig_300i_thruster_retro",
["count"] = 2,
["from_gamedata"] = true,
["hardpoint"] = "hardpoint_thruster_retro_left",
["icon"] = "Datei:Hardpoints Icon Manövriertriebwerk.svg",
["max_size"] = 1,
["min_size"] = 1,
["name"] = "Retroschubdüse",
["root_hardpoint"] = "orig_300i_thruster_retro",
["sub_type"] = "Retroschubdüse",
["thrust_capacity"] = "1.506.761 kN",
["type"] = "Manövriertriebwerk",
["uuid"] = "555d7904-34e0-45fb-8a4f-e628c70c51b7",
},
table#53 {
"300i",
["class"] = "Triebwerk",
["class_name"] = "orig_300i_thruster_mav_fixed_01",
["count"] = 12,
["from_gamedata"] = true,
["hardpoint"] = "hardpoint_mav_thruster_nose_top_left",
["icon"] = "Datei:Hardpoints Icon Manövriertriebwerk.svg",
["max_size"] = 1,
["min_size"] = 1,
["name"] = "Manövriertriebwerk",
["root_hardpoint"] = "orig_300i_thruster_mav_fixed_01",
["sub_type"] = "Manövriertriebwerk",
["type"] = "Manövriertriebwerk",
["uuid"] = "cb1e21ea-131d-4984-9112-30e1369e9258",
},
table#54 {
"300i",
["class"] = "Triebwerk",
["class_name"] = "orig_300i_thruster_main",
["count"] = 1,
["from_gamedata"] = true,
["hardpoint"] = "hardpoint_main_thruster",
["icon"] = "Datei:Hardpoints Icon Haupttriebwerk.svg",
["max_size"] = 4,
["min_size"] = 1,
["name"] = "Haupttriebwerk",
["root_hardpoint"] = "orig_300i_thruster_main",
["sub_type"] = "Haupttriebwerk",
["thrust_capacity"] = "12.599.170 kN",
["type"] = "Haupttriebwerk",
["uuid"] = "06c74aa3-d87e-4a72-88ae-812d213cfc7c",
},
table#55 {
"300i",
["children"] = table#56 {
table#15,
},
["class"] = "Unterstützung",
["class_name"] = "orig_cml_noise_small",
["count"] = 1,
["from_gamedata"] = true,
["hardpoint"] = "hardpoint_countermeasure_right",
["max_size"] = 3,
["min_size"] = 1,
["name"] = "Origin Jumpworks Noise Launcher",
["root_hardpoint"] = "orig_cml_noise_small",
["sub_type"] = "Täuschkörper (Geräusch)",
["type"] = "Defensivmittel",
["uuid"] = "d6e0229a-f18e-4dc6-a590-942089da7a2d",
},
table#57 {
"300i",
["children"] = table#58 {
table#16,
},
["class"] = "Unterstützung",
["class_name"] = "orig_cml_decoy_small",
["count"] = 1,
["from_gamedata"] = true,
["hardpoint"] = "hardpoint_countermeasure_left",
["max_size"] = 3,
["min_size"] = 1,
["name"] = "Origin Jumpworks Decoy Launcher",
["root_hardpoint"] = "orig_cml_decoy_small",
["sub_type"] = "Täuschkörper (Köder)",
["type"] = "Defensivmittel",
["uuid"] = "c113f1d1-536a-4d7d-b770-ce867f60d9b8",
},
}table#1 {
["Antrieb"] = table#2 {
["Quantentreibstofftank"] = table#3 {
table#4 {
"300i",
["class"] = "Antrieb",
["class_name"] = "qtnk_orig_300i",
["count"] = 1,
["from_gamedata"] = true,
["hardpoint"] = "hardpoint_quantum_fuel_tank",
["icon"] = "Datei:Hardpoints Icon Quantentreibstofftank.svg",
["max_size"] = 1,
["min_size"] = 1,
["name"] = "Internal Tank",
["root_hardpoint"] = "qtnk_orig_300i",
["sub_type"] = "Quantentreibstofftank",
["type"] = "Quantentreibstofftank",
["uuid"] = "f27f973d-9757-4fff-bc8d-00657d5b731d",
},
},
["Sprungmodul"] = table#5 {
table#6 {
"300i",
["class"] = "Antrieb",
["class_name"] = "qdrv_tars_s01_expedition_scitem",
["count"] = 1,
["from_gamedata"] = true,
["hardpoint"] = "hardpoint_quantum_drive",
["icon"] = "Datei:Hardpoints Icon Sprungmodul.svg",
["item_class"] = "Civilian",
["item_grade"] = "C",
["item_size"] = 1,
["manufacturer"] = "Tarsus",
["max_size"] = 1,
["min_size"] = 1,
["name"] = "Expedition",
["root_hardpoint"] = "qdrv_tars_s01_expedition_scitem",
["sub_type"] = "Sprungmodul",
["type"] = "Sprungmodul",
["uuid"] = "4702547f-fa0f-4f6c-b2ed-9782ee9f518b",
},
},
["Treibstoffanschluss"] = table#7 {
table#8 {
"300i",
["class"] = "Antrieb",
["class_name"] = "dockingtube_fuel_ports_orig_300i",
["count"] = 1,
["from_gamedata"] = true,
["hardpoint"] = "hardpoint_fuel_port",
["max_size"] = 1,
["min_size"] = 1,
["name"] = "Treibstoffanschluss",
["root_hardpoint"] = "dockingtube_fuel_ports_orig_300i",
["sub_type"] = "Treibstoffanschluss",
["type"] = "Treibstoffanschluss",
["uuid"] = "683e3006-ee36-4c0b-9544-3ee075417ff1",
},
},
["Treibstoffeinlass"] = table#9 {
table#10 {
"300i",
["class"] = "Antrieb",
["class_name"] = "orig_300i_intake",
["count"] = 1,
["from_gamedata"] = true,
["hardpoint"] = "hardpoint_300i_intake",
["icon"] = "Datei:Hardpoints Icon Treibstoffeinlass.svg",
["max_size"] = 1,
["min_size"] = 1,
["name"] = "Treibstoffeinlass",
["root_hardpoint"] = "orig_300i_intake",
["sub_type"] = "Treibstoffeinlass",
["type"] = "Treibstoffeinlass",
["uuid"] = "5d8d75ac-e67d-4af7-915f-e6311a644835",
},
table#11 {
"300i",
["class"] = "Antrieb",
["class_name"] = "intk_orig_300i",
["count"] = 2,
["from_gamedata"] = true,
["fuel_intake_rate"] = "6 L/s6 SCU/s <br />",
["hardpoint"] = "hardpoint_fuel_intake_left",
["icon"] = "Datei:Hardpoints Icon Treibstoffeinlass.svg",
["max_size"] = 1,
["min_size"] = 1,
["name"] = "Treibstoffeinlass",
["root_hardpoint"] = "intk_orig_300i",
["sub_type"] = "Treibstoffeinlass",
["type"] = "Treibstoffeinlass",
["uuid"] = "ed230fc3-27d8-42f5-ad2e-7bc53b77e374",
},
},
["Treibstofftank"] = table#12 {
table#13 {
"300i",
["class"] = "Antrieb",
["class_name"] = "htnk_orig_300i",
["count"] = 2,
["from_gamedata"] = true,
["hardpoint"] = "hardpoint_fuel_tank_left",
["icon"] = "Datei:Hardpoints Icon Treibstofftank.svg",
["max_size"] = 1,
["min_size"] = 1,
["name"] = "Internal Tank",
["root_hardpoint"] = "htnk_orig_300i",
["sub_type"] = "Treibstofftank",
["type"] = "Treibstofftank",
["uuid"] = "bd985eb3-b2ae-495b-b776-2e955cfb324c",
},
},
},
["Ausstattung"] = table#14 {
["Bett"] = table#15 {
table#16 {
"300i",
["class"] = "Ausstattung",
["class_name"] = "orig_300i_seat_bed",
["count"] = 1,
["from_gamedata"] = true,
["hardpoint"] = "hardpoint_bed",
["max_size"] = 1,
["min_size"] = 1,
["name"] = "Bett",
["root_hardpoint"] = "orig_300i_seat_bed",
["sub_type"] = "Bett",
["type"] = "Bett",
["uuid"] = "05f30fb7-2aa4-497a-8e30-9b07f2993460",
},
},
["Panzerung"] = table#17 {
table#18 {
"300i",
["class"] = "Ausstattung",
["class_name"] = "armr_orig_300i",
["count"] = 1,
["from_gamedata"] = true,
["hardpoint"] = "hardpoint_armor",
["max_size"] = 1,
["min_size"] = 1,
["name"] = "300i Ship Armor",
["root_hardpoint"] = "armr_orig_300i",
["sub_type"] = "Panzerung",
["type"] = "Panzerung",
["uuid"] = "8fa4aa51-ff08-4728-ae08-64861ab3daf9",
},
},
},
["Avionik"] = table#19 {
["Radar"] = table#20 {
table#21 {
"300i",
["class"] = "Avionik",
["class_name"] = "radr_wlop_s01_capstan",
["count"] = 1,
["from_gamedata"] = true,
["hardpoint"] = "hardpoint_radar",
["icon"] = "Datei:Hardpoints Icon Radar.svg",
["item_class"] = "Civilian",
["item_grade"] = "C",
["item_size"] = 1,
["manufacturer"] = "Unknown manufacturer",
["max_size"] = 1,
["min_size"] = 1,
["name"] = "Capston",
["root_hardpoint"] = "radr_wlop_s01_capstan",
["sub_type"] = "Radar",
["type"] = "Radar",
["uuid"] = "22121214-6333-4edd-826a-0d06c15b5636",
},
},
},
["Bewaffnung"] = table#22 {
["Bewaffnung"] = table#23 {
table#24 {
"300i",
["children"] = table#25 {
table#26 {
"300i",
["children"] = table#27 {
table#28 {
"300i",
["class"] = "Bewaffnung",
["class_name"] = "faux_magazinemagazine",
["count"] = 1,
["from_gamedata"] = true,
["hardpoint"] = "faux_hardpoint_magazine",
["icon"] = "Datei:Hardpoints Icon Magazin.svg",
["isChild"] = true,
["magazine_capacity"] = 0,
["max_size"] = 1,
["min_size"] = 1,
["name"] = "Magazin",
["parent_hardpoint"] = "M5A Cannon",
["parent_uuid"] = "f72ca643-b48c-4f6e-abb7-d5bc8eb261aa",
["root_hardpoint"] = "mount_gimbal_s3",
["sub_type"] = "Magazin",
["type"] = "Magazin",
},
},
["class"] = "Bewaffnung",
["class_name"] = "behr_lasercannon_s3",
["count"] = 1,
["from_gamedata"] = true,
["hardpoint"] = "hardpoint_class_2",
["icon"] = "Datei:Hardpoints Icon Waffe.svg",
["isChild"] = true,
["item_size"] = 3,
["manufacturer"] = "Behring Applied Technology",
["max_size"] = 3,
["min_size"] = 2,
["name"] = "M5A Cannon",
["parent_hardpoint"] = "VariPuck S3 Gimbal Mount",
["parent_uuid"] = "8197c45b-eaf4-4836-a8f0-837d1875cd9c",
["root_hardpoint"] = "mount_gimbal_s3",
["sub_type"] = "WeaponGun",
["type"] = "Bewaffnung",
["uuid"] = "f72ca643-b48c-4f6e-abb7-d5bc8eb261aa",
},
table#29 {
"300i",
["children"] = table#30 {
table#31 {
"300i",
["class"] = "Bewaffnung",
["class_name"] = "faux_magazinemagazine",
["count"] = 2,
["from_gamedata"] = true,
["hardpoint"] = "faux_hardpoint_magazine",
["icon"] = "Datei:Hardpoints Icon Magazin.svg",
["isChild"] = true,
["magazine_capacity"] = 2589,
["max_size"] = 1,
["min_size"] = 1,
["name"] = "Magazin",
["parent_hardpoint"] = "SW16BR3 “Shredder” Repeater",
["parent_uuid"] = "bbfbb4b5-c26e-4bee-9d41-9679e102e860",
["root_hardpoint"] = "mount_gimbal_s3",
["sub_type"] = "Magazin",
["type"] = "Magazin",
},
},
["class"] = "Bewaffnung",
["class_name"] = "behr_ballisticrepeater_s3",
["count"] = 2,
["from_gamedata"] = true,
["hardpoint"] = "hardpoint_class_2",
["icon"] = "Datei:Hardpoints Icon Waffe.svg",
["isChild"] = true,
["max_size"] = 3,
["min_size"] = 2,
["name"] = "SW16BR3 “Shredder” Repeater",
["parent_hardpoint"] = "VariPuck S3 Gimbal Mount",
["parent_uuid"] = "8197c45b-eaf4-4836-a8f0-837d1875cd9c",
["root_hardpoint"] = "mount_gimbal_s3",
["sub_type"] = "WeaponGun",
["type"] = "Bewaffnung",
["uuid"] = "bbfbb4b5-c26e-4bee-9d41-9679e102e860",
},
},
["class"] = "Bewaffnung",
["class_name"] = "mount_gimbal_s3",
["count"] = 3,
["from_gamedata"] = true,
["hardpoint"] = "hardpoint_weapon_wing_left",
["icon"] = "Datei:Hardpoints Icon Waffe.svg",
["item_size"] = 4,
["manufacturer"] = "Flashfire Systems",
["max_size"] = 3,
["min_size"] = 3,
["name"] = "VariPuck S3 Gimbal Mount",
["root_hardpoint"] = "mount_gimbal_s3",
["sub_type"] = "Kardanische Halterung",
["type"] = "Bewaffnung",
["uuid"] = "8197c45b-eaf4-4836-a8f0-837d1875cd9c",
},
},
["Geschütze"] = table#32 {
table#33 {
"300i",
["children"] = table#34 {
table#35 {
"300i",
["class"] = "Bewaffnung",
["class_name"] = "misl_s02_cs_thcn_strikeforce",
["count"] = 2,
["from_gamedata"] = true,
["hardpoint"] = "missile_01_attach",
["icon"] = "Datei:Hardpoints Icon Geschütze.svg",
["isChild"] = true,
["item_size"] = 2,
["manufacturer"] = "Thermyte Concern",
["max_size"] = 2,
["min_size"] = 2,
["name"] = "StrikeForce II Missile",
["parent_hardpoint"] = "MSD-212 Missile Rack",
["parent_uuid"] = "b684b116-ba0d-41fb-82fb-720ecd6d4d21",
["root_hardpoint"] = "mrck_s02_behr_single_s02",
["sub_type"] = "Raketen",
["type"] = "Geschütze",
["uuid"] = "9b2c25cb-fc57-42b5-95cd-1ae89a622bd7",
},
},
["class"] = "Bewaffnung",
["class_name"] = "mrck_s02_behr_single_s02",
["count"] = 2,
["from_gamedata"] = true,
["hardpoint"] = "hardpoint_weapon_missilerack_left",
["icon"] = "Datei:Hardpoints Icon Geschütze.svg",
["item_size"] = 2,
["manufacturer"] = "Behring Applied Technology",
["max_size"] = 2,
["min_size"] = 2,
["name"] = "MSD-212 Missile Rack",
["root_hardpoint"] = "mrck_s02_behr_single_s02",
["sub_type"] = "Raketenwerfer",
["type"] = "Geschütze",
["uuid"] = "b684b116-ba0d-41fb-82fb-720ecd6d4d21",
},
},
},
["Fahrzeugpart"] = table#36 {
["Fahrzeugpart"] = table#37 {
table#38 {
"300i",
["children"] = table#39 {
table#40 {
"300i",
["children"] = table#41 {
table#42 {
"300i",
["children"] = table#43 {
table#44 {
"300i",
["class"] = "Fahrzeugpart",
["count"] = 1,
["from_gamedata"] = true,
["hardpoint"] = "wing_right_top",
["hp"] = "200 ❤️",
["isChild"] = true,
["max_size"] = 1,
["min_size"] = 1,
["name"] = "Wing (right top)",
["parent_hardpoint"] = "Wing (right bottom)",
["root_hardpoint"] = "ORIG_300I",
["sub_type"] = "Fahrzeugpart",
["type"] = "Fahrzeugpart",
},
table#45 {
"300i",
["class"] = "Fahrzeugpart",
["count"] = 1,
["from_gamedata"] = true,
["hardpoint"] = "wing_flap_right",
["hp"] = "200 ❤️",
["isChild"] = true,
["max_size"] = 1,
["min_size"] = 1,
["name"] = "Wing flap (right)",
["parent_hardpoint"] = "Wing (right bottom)",
["root_hardpoint"] = "ORIG_300I",
["sub_type"] = "Fahrzeugpart",
["type"] = "Fahrzeugpart",
},
table#46 {
"300i",
["class"] = "Fahrzeugpart",
["count"] = 1,
["from_gamedata"] = true,
["hardpoint"] = "wing_b_right",
["hp"] = "500 ❤️",
["isChild"] = true,
["max_size"] = 1,
["min_size"] = 1,
["name"] = "Wing b (right)",
["parent_hardpoint"] = "Wing (right bottom)",
["root_hardpoint"] = "ORIG_300I",
["sub_type"] = "Fahrzeugpart",
["type"] = "Fahrzeugpart",
},
},
["class"] = "Fahrzeugpart",
["count"] = 1,
["from_gamedata"] = true,
["hardpoint"] = "wing_right_bottom",
["hp"] = "800 ❤️",
["isChild"] = true,
["max_size"] = 1,
["min_size"] = 1,
["name"] = "Wing (right bottom)",
["parent_hardpoint"] = "Nose",
["root_hardpoint"] = "ORIG_300I",
["sub_type"] = "Fahrzeugpart",
["type"] = "Fahrzeugpart",
},
table#47 {
"300i",
["children"] = table#48 {
table#49 {
"300i",
["class"] = "Fahrzeugpart",
["count"] = 1,
["from_gamedata"] = true,
["hardpoint"] = "wing_left_top",
["hp"] = "200 ❤️",
["isChild"] = true,
["max_size"] = 1,
["min_size"] = 1,
["name"] = "Wing (left top)",
["parent_hardpoint"] = "Wing (left bottom)",
["root_hardpoint"] = "ORIG_300I",
["sub_type"] = "Fahrzeugpart",
["type"] = "Fahrzeugpart",
},
table#50 {
"300i",
["class"] = "Fahrzeugpart",
["count"] = 1,
["from_gamedata"] = true,
["hardpoint"] = "wing_flap_left",
["hp"] = "200 ❤️",
["isChild"] = true,
["max_size"] = 1,
["min_size"] = 1,
["name"] = "Wing flap (left)",
["parent_hardpoint"] = "Wing (left bottom)",
["root_hardpoint"] = "ORIG_300I",
["sub_type"] = "Fahrzeugpart",
["type"] = "Fahrzeugpart",
},
table#51 {
"300i",
["class"] = "Fahrzeugpart",
["count"] = 1,
["from_gamedata"] = true,
["hardpoint"] = "wing_b_left",
["hp"] = "500 ❤️",
["isChild"] = true,
["max_size"] = 1,
["min_size"] = 1,
["name"] = "Wing b (left)",
["parent_hardpoint"] = "Wing (left bottom)",
["root_hardpoint"] = "ORIG_300I",
["sub_type"] = "Fahrzeugpart",
["type"] = "Fahrzeugpart",
},
},
["class"] = "Fahrzeugpart",
["count"] = 1,
["from_gamedata"] = true,
["hardpoint"] = "wing_left_bottom",
["hp"] = "800 ❤️",
["isChild"] = true,
["max_size"] = 1,
["min_size"] = 1,
["name"] = "Wing (left bottom)",
["parent_hardpoint"] = "Nose",
["root_hardpoint"] = "ORIG_300I",
["sub_type"] = "Fahrzeugpart",
["type"] = "Fahrzeugpart",
},
table#52 {
"300i",
["class"] = "Fahrzeugpart",
["count"] = 1,
["from_gamedata"] = true,
["hardpoint"] = "tail",
["hp"] = "1.900 ❤️",
["isChild"] = true,
["max_size"] = 1,
["min_size"] = 1,
["name"] = "Tail",
["parent_hardpoint"] = "Nose",
["root_hardpoint"] = "ORIG_300I",
["sub_type"] = "Fahrzeugpart",
["type"] = "Fahrzeugpart",
},
table#53 {
"300i",
["class"] = "Fahrzeugpart",
["count"] = 1,
["from_gamedata"] = true,
["hardpoint"] = "glass_canopy_front",
["hp"] = "1.500 ❤️",
["isChild"] = true,
["max_size"] = 1,
["min_size"] = 1,
["name"] = "Glass canopy (front)",
["parent_hardpoint"] = "Nose",
["root_hardpoint"] = "ORIG_300I",
["sub_type"] = "Fahrzeugpart",
["type"] = "Fahrzeugpart",
},
},
["class"] = "Fahrzeugpart",
["count"] = 1,
["from_gamedata"] = true,
["hardpoint"] = "nose",
["hp"] = "1.900 ❤️",
["isChild"] = true,
["max_size"] = 1,
["min_size"] = 1,
["name"] = "Nose",
["parent_hardpoint"] = "Orig 300i",
["root_hardpoint"] = "ORIG_300I",
["sub_type"] = "Fahrzeugpart",
["type"] = "Fahrzeugpart",
},
},
["class"] = "Fahrzeugpart",
["count"] = 1,
["from_gamedata"] = true,
["hardpoint"] = "ORIG_300I",
["hp"] = "0 ❤️",
["max_size"] = 1,
["min_size"] = 1,
["name"] = "Orig 300i",
["root_hardpoint"] = "ORIG_300I",
["sub_type"] = "Fahrzeugpart",
["type"] = "Fahrzeugpart",
},
},
},
["Frachtraum"] = table#54 {
["Frachtraum"] = table#55 {
table#56 {
"300i",
["class"] = "Frachtraum",
["class_name"] = "orig_300i_cargogrid",
["count"] = 1,
["from_gamedata"] = true,
["hardpoint"] = "hardpoint_cargo_grid_front",
["max_size"] = 1,
["min_size"] = 1,
["name"] = "Frachtraum",
["root_hardpoint"] = "orig_300i_cargogrid",
["scu"] = 8000,
["sub_type"] = "Frachtraum",
["type"] = "Frachtraum",
["uuid"] = "1bddc2cc-3765-4eec-8430-31c1697c78eb",
},
},
["Waffenständer"] = table#57 {
table#58 {
"300i",
["children"] = table#59 {
table#60 {
"300i",
["class"] = "Bewaffnung",
["class_name"] = "faux_weaponport",
["count"] = 3,
["from_gamedata"] = true,
["hardpoint"] = "faux_hardpoint_weaponport",
["icon"] = "Datei:Hardpoints Icon Waffenport.svg",
["isChild"] = true,
["max_size"] = 1,
["min_size"] = 0,
["name"] = "Pistole",
["parent_hardpoint"] = "Waffenständer",
["parent_uuid"] = "a0d9d219-a054-44ca-be18-a167a7c1c56d",
["root_hardpoint"] = "weapon_rack_orig_300i_2_slots",
["sub_type"] = "Waffenport",
["type"] = "Waffenport",
},
table#61 {
"300i",
["class"] = "Bewaffnung",
["class_name"] = "faux_weaponport",
["count"] = 2,
["from_gamedata"] = true,
["hardpoint"] = "faux_hardpoint_weaponport",
["icon"] = "Datei:Hardpoints Icon Waffenport.svg",
["isChild"] = true,
["max_size"] = 4,
["min_size"] = 2,
["name"] = "Gewehr",
["parent_hardpoint"] = "Waffenständer",
["parent_uuid"] = "a0d9d219-a054-44ca-be18-a167a7c1c56d",
["root_hardpoint"] = "weapon_rack_orig_300i_2_slots",
["sub_type"] = "Waffenport",
["type"] = "Waffenport",
},
},
["class"] = "Frachtraum",
["class_name"] = "weapon_rack_orig_300i_2_slots",
["count"] = 1,
["from_gamedata"] = true,
["hardpoint"] = "hardpoint_weapon_rack",
["icon"] = "Datei:Hardpoints Icon Pistole S38.svg",
["max_size"] = 1,
["min_size"] = 1,
["name"] = "Waffenständer",
["root_hardpoint"] = "weapon_rack_orig_300i_2_slots",
["sub_type"] = "Waffenständer",
["type"] = "Waffenständer",
["uuid"] = "a0d9d219-a054-44ca-be18-a167a7c1c56d",
},
},
},
["Systeme"] = table#62 {
["Kraftwerksanlage"] = table#63 {
table#64 {
"300i",
["class"] = "Systeme",
["class_name"] = "powr_lplt_s01_powerbolt_scitem",
["count"] = 1,
["from_gamedata"] = true,
["hardpoint"] = "hardpoint_power_plant",
["icon"] = "Datei:Hardpoints Icon Kraftwerksanlage.svg",
["item_class"] = "Civilian",
["item_grade"] = "C",
["item_size"] = 1,
["manufacturer"] = "Lightning Power Ltd.",
["max_size"] = 1,
["min_size"] = 1,
["name"] = "PowerBolt",
["root_hardpoint"] = "powr_lplt_s01_powerbolt_scitem",
["sub_type"] = "Kraftwerksanlage",
["type"] = "Kraftwerksanlage",
["uuid"] = "4a4a2a9c-040f-4f36-befe-7101b230fa53",
},
},
["Kühlaggregat"] = table#65 {
table#66 {
"300i",
["class"] = "Systeme",
["class_name"] = "cool_lplt_s01_arcticstorm_scitem",
["count"] = 2,
["from_gamedata"] = true,
["hardpoint"] = "hardpoint_cooler_left",
["icon"] = "Datei:Hardpoints Icon Kühlaggregat.svg",
["item_class"] = "Civilian",
["item_grade"] = "C",
["item_size"] = 1,
["manufacturer"] = "Lightning Power Ltd.",
["max_size"] = 1,
["min_size"] = 1,
["name"] = "ArcticStorm",
["root_hardpoint"] = "cool_lplt_s01_arcticstorm_scitem",
["sub_type"] = "Kühlaggregat",
["type"] = "Kühlaggregat",
["uuid"] = "d98450a2-605a-47b6-a8cd-f43df14ddf0e",
},
},
["Lebenserhaltungssysteme"] = table#67 {
table#68 {
"300i",
["class"] = "Systeme",
["class_name"] = "lfsp_tydt_s01_comfortair",
["count"] = 1,
["from_gamedata"] = true,
["hardpoint"] = "hardpoint_lifesupport",
["icon"] = "Datei:Hardpoints Icon lifesupport.svg",
["max_size"] = 1,
["min_size"] = 1,
["name"] = "ComfortAir",
["root_hardpoint"] = "lfsp_tydt_s01_comfortair",
["sub_type"] = "Lebenserhaltungssysteme",
["type"] = "Lebenserhaltungssysteme",
["uuid"] = "e947b002-e65e-4637-90b7-c894925d6625",
},
},
["Schildgenerator"] = table#69 {
table#70 {
"300i",
["class"] = "Systeme",
["class_name"] = "shld_seco_s01_web_scitem",
["count"] = 2,
["from_gamedata"] = true,
["hardpoint"] = "hardpoint_shield_generator_left",
["icon"] = "Datei:Hardpoints Icon Schildgenerator.svg",
["item_class"] = "Civilian",
["item_grade"] = "C",
["item_size"] = 1,
["manufacturer"] = "Seal Corporation",
["max_size"] = 1,
["min_size"] = 1,
["name"] = "WEB",
["root_hardpoint"] = "shld_seco_s01_web_scitem",
["sub_type"] = "Schildgenerator",
["type"] = "Schildgenerator",
["uuid"] = "6be9c02c-ff32-483f-a6f8-d984dcb97c40",
},
},
["Selbstzerstörung"] = table#71 {
table#72 {
"300i",
["class"] = "Systeme",
["class_name"] = "vhcl_selfdestruct_30s",
["count"] = 1,
["damage"] = "5.000 🗡️",
["damage_radius"] = "50 m50 km <br />5.000 cm <br />",
["from_gamedata"] = true,
["hardpoint"] = "hardpoint_selfdestruct",
["icon"] = "Datei:Hardpoints Icon Selbstzerstörung.svg",
["max_size"] = 1,
["min_size"] = 1,
["name"] = "Selbstzerstörung (30s)",
["root_hardpoint"] = "vhcl_selfdestruct_30s",
["sub_type"] = "Selbstzerstörung",
["type"] = "Selbstzerstörung",
["uuid"] = "27875030-1290-4098-827f-f1a5b67c0615",
},
},
},
["Triebwerk"] = table#73 {
["Haupttriebwerk"] = table#74 {
table#75 {
"300i",
["class"] = "Triebwerk",
["class_name"] = "orig_300i_thruster_main",
["count"] = 1,
["from_gamedata"] = true,
["hardpoint"] = "hardpoint_main_thruster",
["icon"] = "Datei:Hardpoints Icon Haupttriebwerk.svg",
["max_size"] = 4,
["min_size"] = 1,
["name"] = "Haupttriebwerk",
["root_hardpoint"] = "orig_300i_thruster_main",
["sub_type"] = "Haupttriebwerk",
["thrust_capacity"] = "12.599.170 kN",
["type"] = "Haupttriebwerk",
["uuid"] = "06c74aa3-d87e-4a72-88ae-812d213cfc7c",
},
},
["Manövriertriebwerk"] = table#76 {
table#77 {
"300i",
["class"] = "Triebwerk",
["class_name"] = "orig_300i_thruster_retro",
["count"] = 2,
["from_gamedata"] = true,
["hardpoint"] = "hardpoint_thruster_retro_left",
["icon"] = "Datei:Hardpoints Icon Manövriertriebwerk.svg",
["max_size"] = 1,
["min_size"] = 1,
["name"] = "Retroschubdüse",
["root_hardpoint"] = "orig_300i_thruster_retro",
["sub_type"] = "Retroschubdüse",
["thrust_capacity"] = "1.506.761 kN",
["type"] = "Manövriertriebwerk",
["uuid"] = "555d7904-34e0-45fb-8a4f-e628c70c51b7",
},
table#78 {
"300i",
["class"] = "Triebwerk",
["class_name"] = "orig_300i_thruster_mav_fixed_01",
["count"] = 12,
["from_gamedata"] = true,
["hardpoint"] = "hardpoint_mav_thruster_nose_top_left",
["icon"] = "Datei:Hardpoints Icon Manövriertriebwerk.svg",
["max_size"] = 1,
["min_size"] = 1,
["name"] = "Manövriertriebwerk",
["root_hardpoint"] = "orig_300i_thruster_mav_fixed_01",
["sub_type"] = "Manövriertriebwerk",
["type"] = "Manövriertriebwerk",
["uuid"] = "cb1e21ea-131d-4984-9112-30e1369e9258",
},
},
},
["Unterstützung"] = table#79 {
["Defensivmittel"] = table#80 {
table#81 {
"300i",
["children"] = table#82 {
table#83 {
"300i",
["class"] = "Bewaffnung",
["class_name"] = "faux_magazinemagazine",
["count"] = 1,
["from_gamedata"] = true,
["hardpoint"] = "faux_hardpoint_magazine",
["icon"] = "Datei:Hardpoints Icon Magazin.svg",
["isChild"] = true,
["max_size"] = 1,
["min_size"] = 1,
["name"] = "Magazin",
["parent_hardpoint"] = "Origin Jumpworks Noise Launcher",
["parent_uuid"] = "d6e0229a-f18e-4dc6-a590-942089da7a2d",
["root_hardpoint"] = "orig_cml_noise_small",
["sub_type"] = "Magazin",
["type"] = "Magazin",
},
},
["class"] = "Unterstützung",
["class_name"] = "orig_cml_noise_small",
["count"] = 1,
["from_gamedata"] = true,
["hardpoint"] = "hardpoint_countermeasure_right",
["max_size"] = 3,
["min_size"] = 1,
["name"] = "Origin Jumpworks Noise Launcher",
["root_hardpoint"] = "orig_cml_noise_small",
["sub_type"] = "Täuschkörper (Geräusch)",
["type"] = "Defensivmittel",
["uuid"] = "d6e0229a-f18e-4dc6-a590-942089da7a2d",
},
table#84 {
"300i",
["children"] = table#85 {
table#86 {
"300i",
["class"] = "Bewaffnung",
["class_name"] = "faux_magazinemagazine",
["count"] = 1,
["from_gamedata"] = true,
["hardpoint"] = "faux_hardpoint_magazine",
["icon"] = "Datei:Hardpoints Icon Magazin.svg",
["isChild"] = true,
["max_size"] = 1,
["min_size"] = 1,
["name"] = "Magazin",
["parent_hardpoint"] = "Origin Jumpworks Decoy Launcher",
["parent_uuid"] = "c113f1d1-536a-4d7d-b770-ce867f60d9b8",
["root_hardpoint"] = "orig_cml_decoy_small",
["sub_type"] = "Magazin",
["type"] = "Magazin",
},
},
["class"] = "Unterstützung",
["class_name"] = "orig_cml_decoy_small",
["count"] = 1,
["from_gamedata"] = true,
["hardpoint"] = "hardpoint_countermeasure_left",
["max_size"] = 3,
["min_size"] = 1,
["name"] = "Origin Jumpworks Decoy Launcher",
["root_hardpoint"] = "orig_cml_decoy_small",
["sub_type"] = "Täuschkörper (Köder)",
["type"] = "Defensivmittel",
["uuid"] = "c113f1d1-536a-4d7d-b770-ce867f60d9b8",
},
},
},
}table#1 {
["Antrieb"] = "1xS11xS1Civilian (C) Treibstoffanschluss2xS16 L/s6 SCU/s <br />2xS1",
["Ausstattung"] = " Bett1xS1 Panzerung1xS1",
["Avionik"] = "1xS1Civilian (C)",
["Bewaffnung"] = "1xS10/0 Schuss2xS12589/2589 Schuss",
["Fahrzeugpart"] = " Fahrzeugpart1xS10 ❤️1xS11.900 ❤️1xS1800 ❤️1xS1200 ❤️1xS1200 ❤️1xS1500 ❤️1xS1800 ❤️1xS1200 ❤️1xS1200 ❤️1xS1500 ❤️1xS11.900 ❤️1xS11.500 ❤️",
["Frachtraum"] = " Frachtraum1x8.000 SCU",
["Systeme"] = "1xS1Civilian (C)2xS1Civilian (C)Datei:Hardpoints Icon lifesupport.svg Lebenserhaltungssysteme1xS12xS1Civilian (C)1xS15.000 🗡️ · 50 m50 km <br />5.000 cm <br />",
["Triebwerk"] = "1xS412.599.170 kN2xS11.506.761 kN12xS1",
["Unterstützung"] = " Defensivmittel",
["info"] = "'\"`UNIQ--templatestyles-0000000A-QINU`\"'",
}

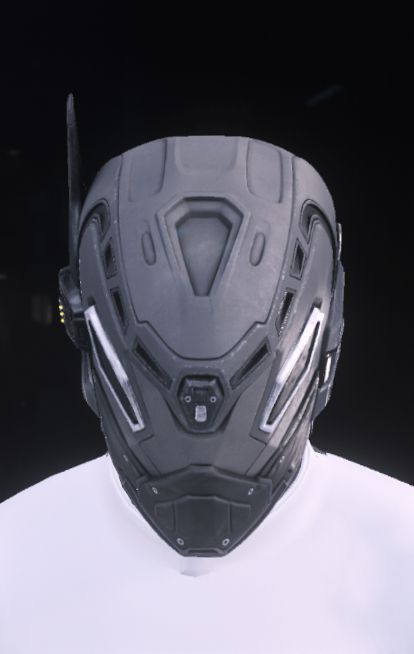
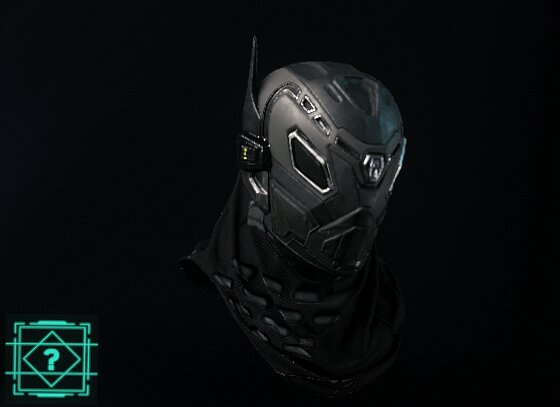
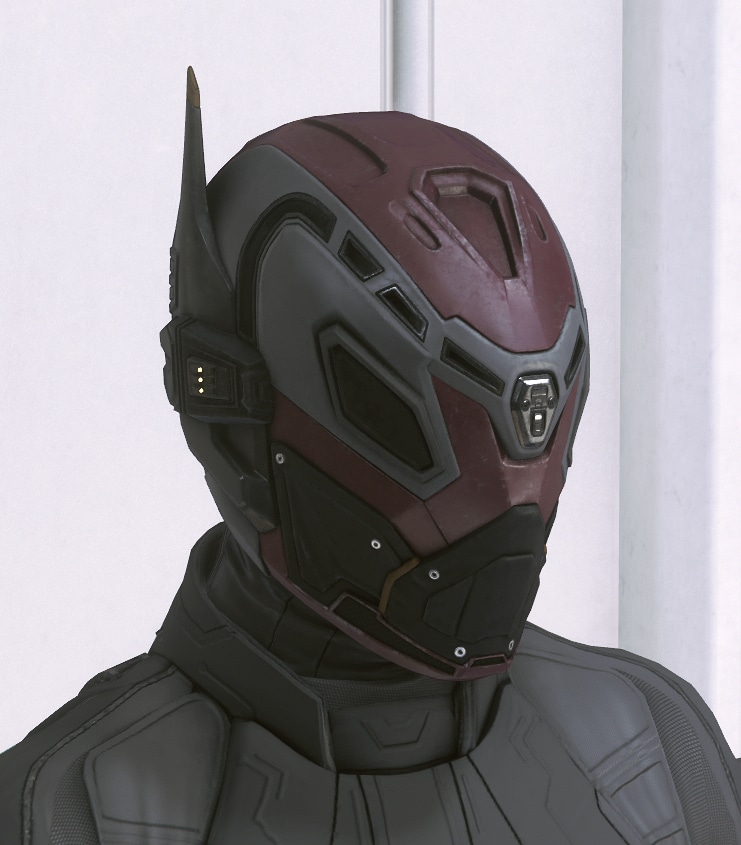
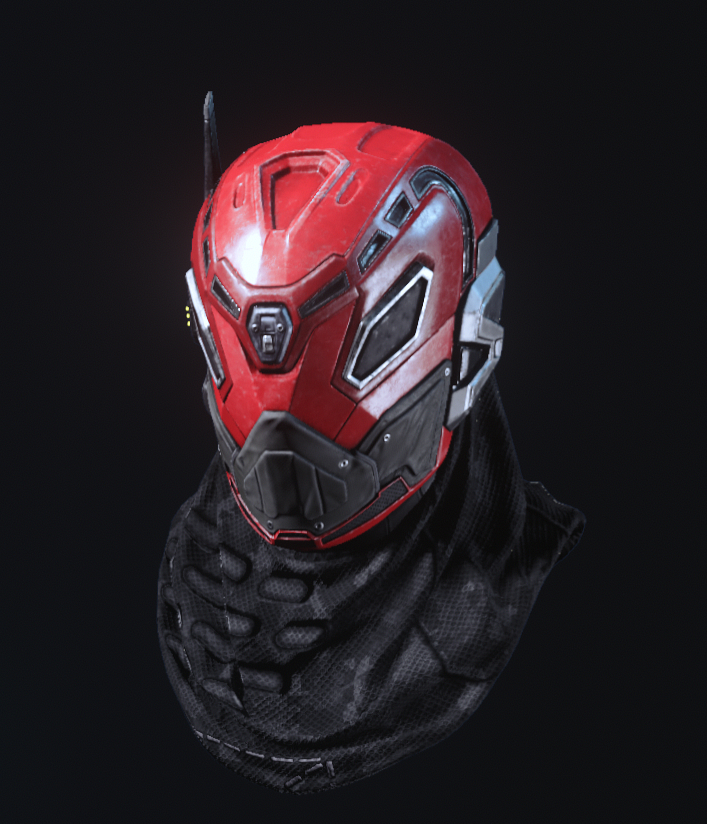
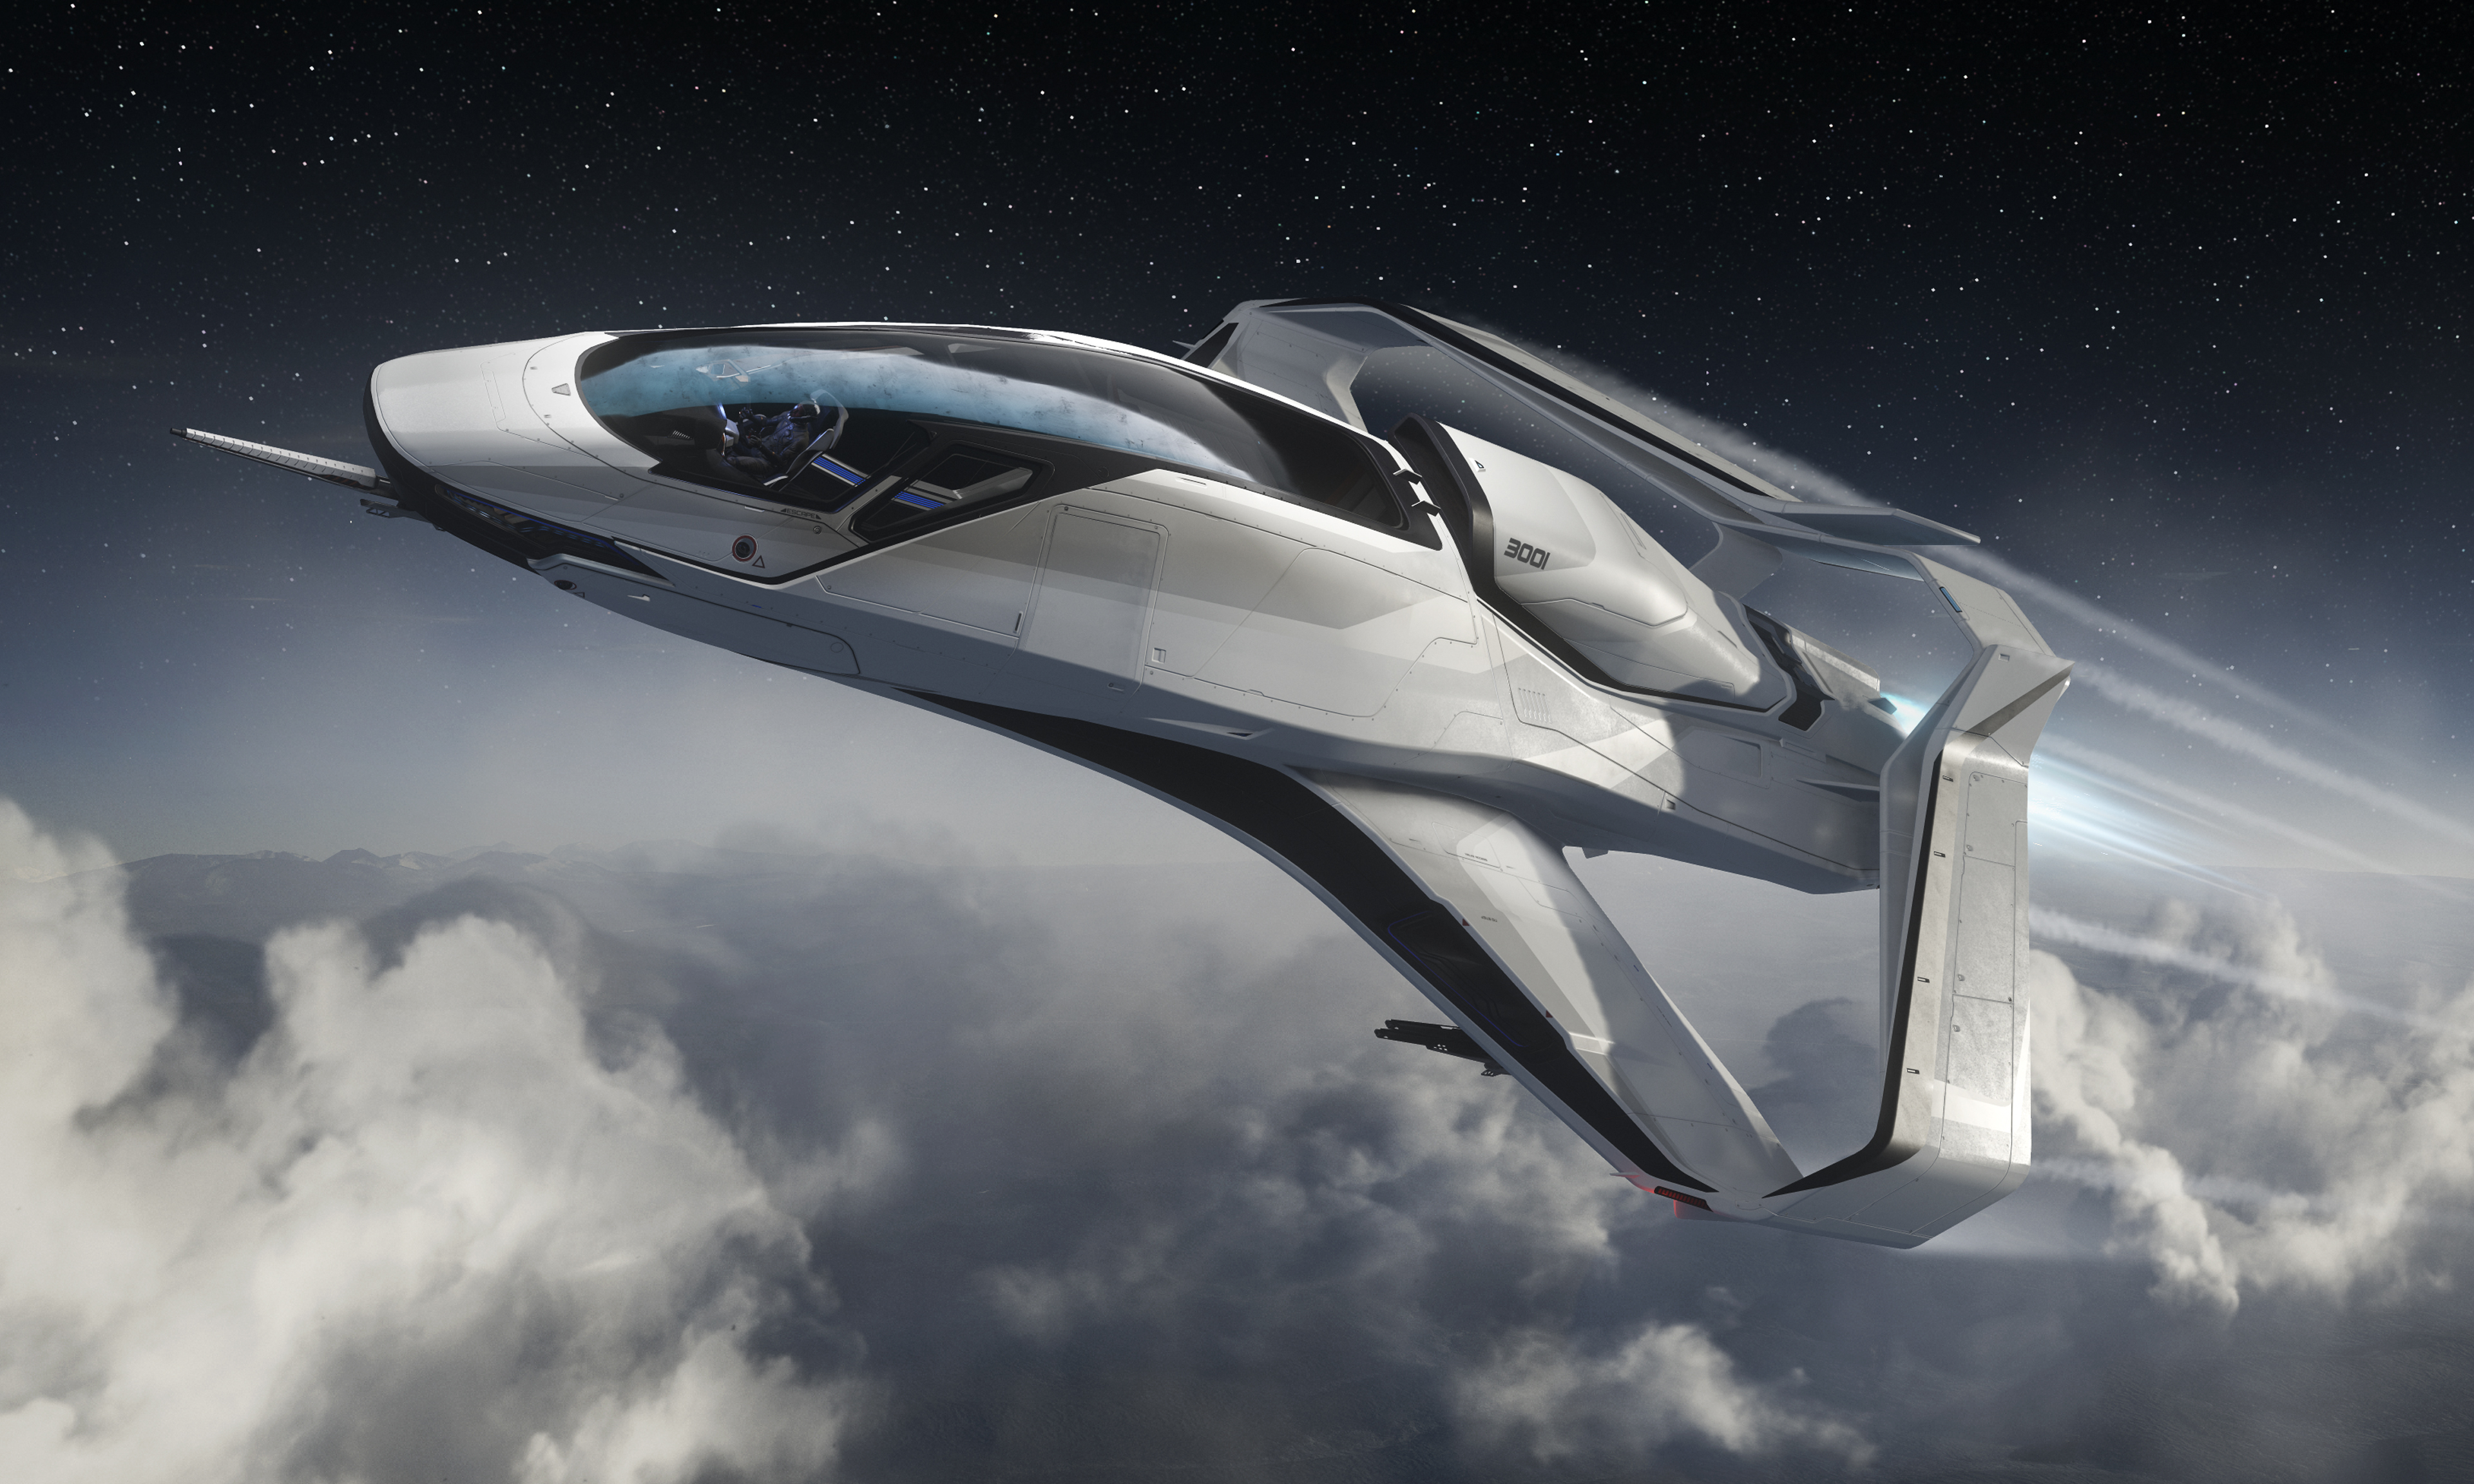